
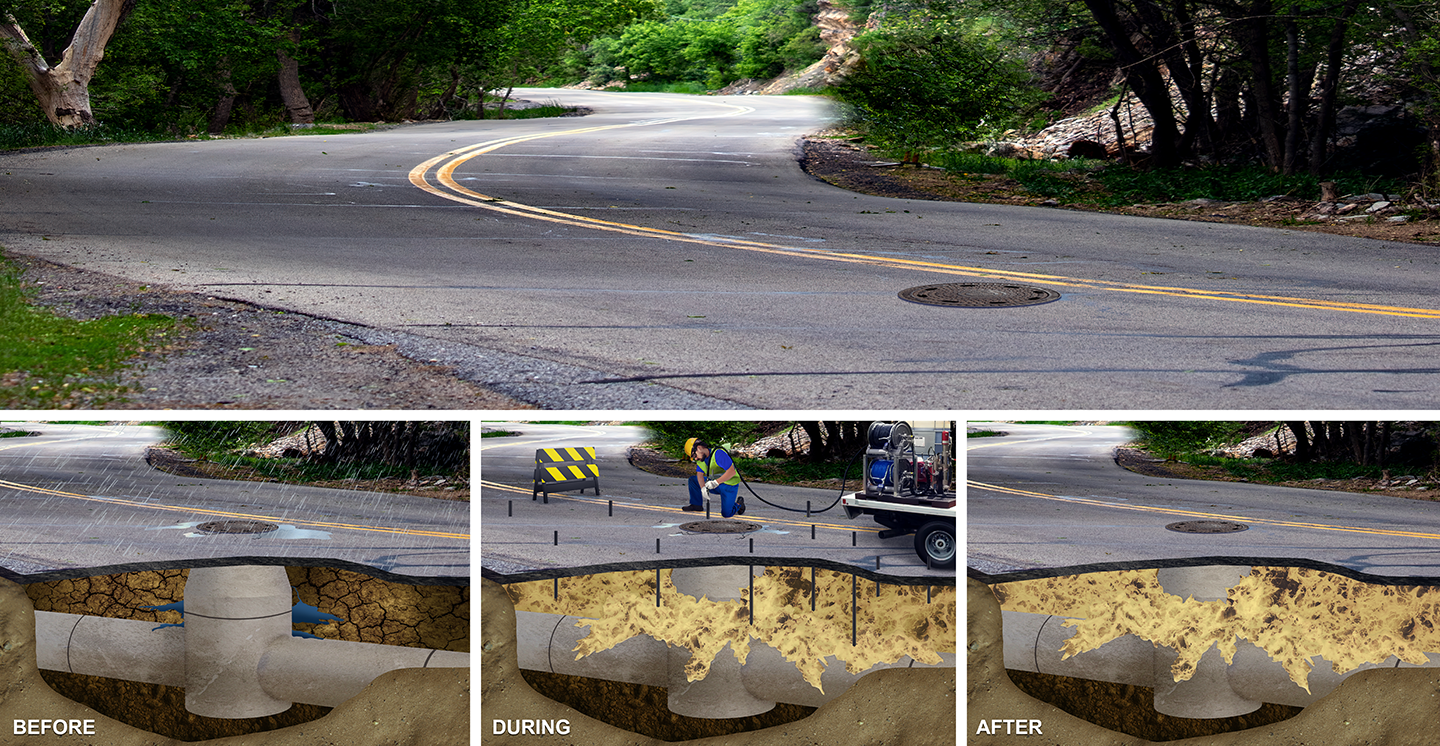
Stabilization Grout Process
Step 1: Assess and Prepare
Determine cause of problem, explain scope of work to client, protect surfaces, drill holes.
Step 2: Stabilize Soil
Inject enough foam to stabilize soil.
Step 3: Clean Up and Review
Clean the surface and review site with client to ensure their satisfaction.
Fact: AP Soil Stabilization Foam Cures Stronger Than Crystaline Bedrock
What Causes Unstable Soil?
Erosion
Poor drainage, improperly placed downspouts, leaking drain pipes, and broken water lines are common culprits.
Poor Compaction
When backfilling on a jobsite, the contractor is supposed to compact the backfill by driving over it with heavy equipment. However, this isn’t always done properly for one reason or another.
Biological Decay
Construction trash pits, buried trees, and
other biodegradable materials all break down. Sometimes structures are built over these areas.
How Does Stabilization Grout Help?
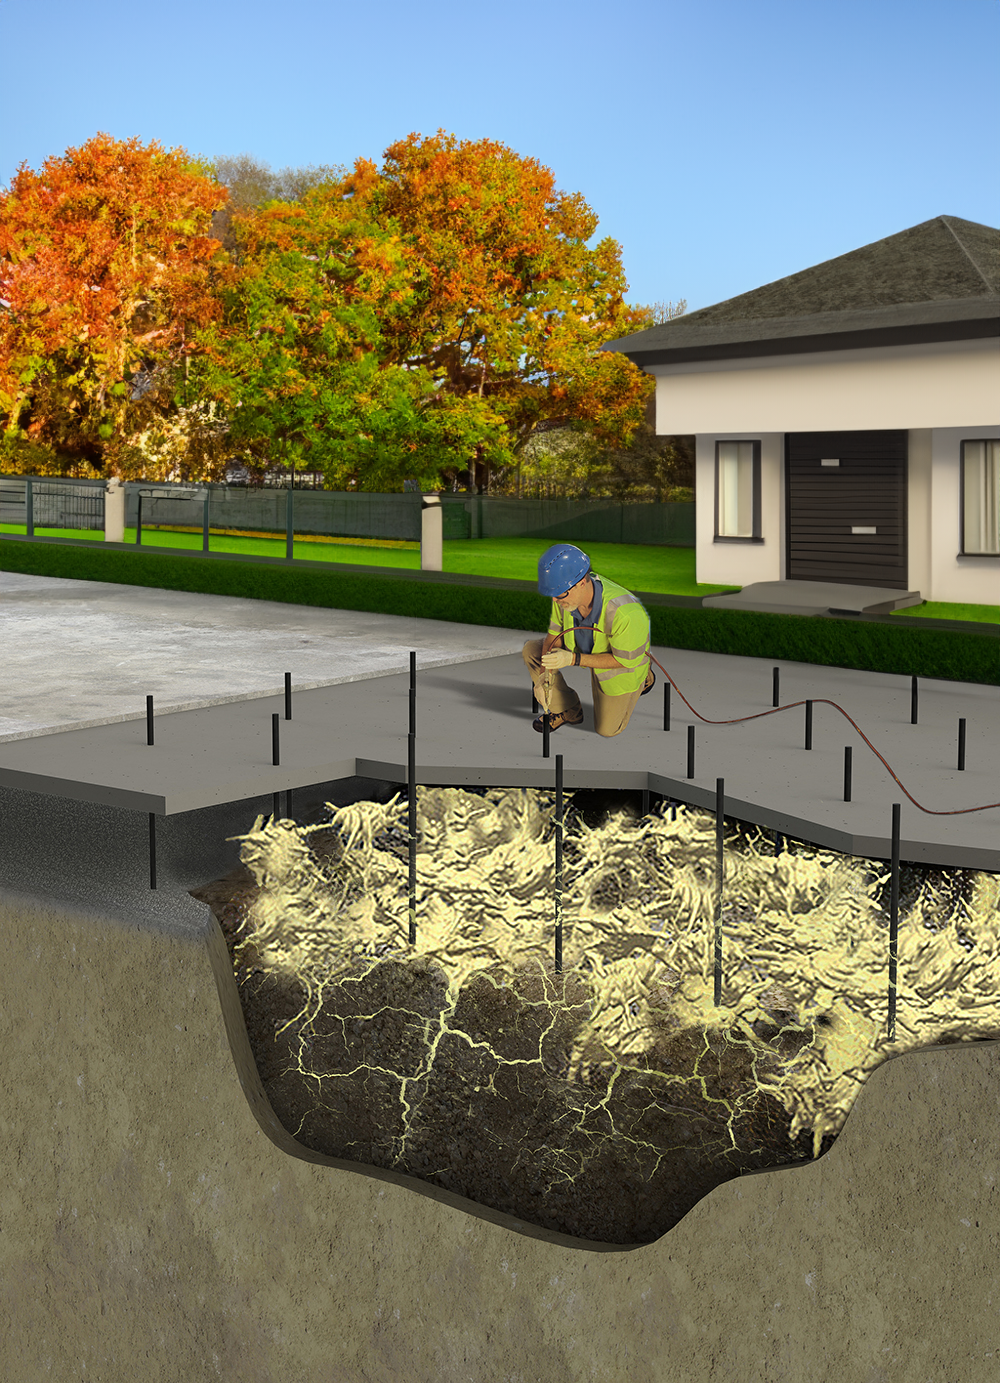
Strengthens Soil
AP Foam allows contractors to strengthen soil for support of heavy structures.
Reinforcing Eroded Areas
Stabilization Grout reacts with water to cure into a solid mass and reverse the erosion process.
Compacting Soil
The stabilization process compacts loose soil to create a strong substrate.
Filling Voids Caused by Decay
Stabilization Grout fills voids before it cures, making it a great solution for instances of biological decay.
What Are the Results?
Use of Slab the Same Day as Repair
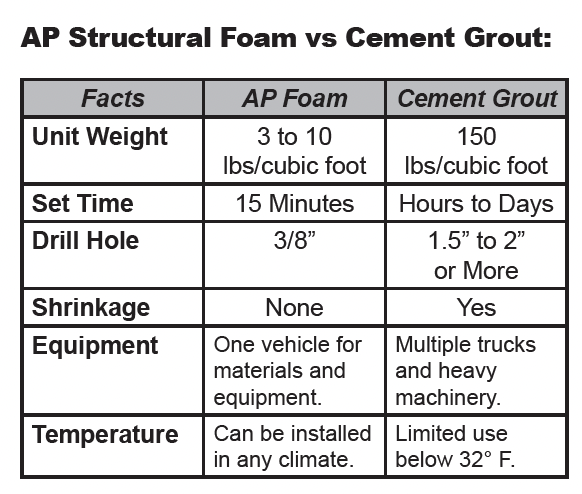
AP Foam cures to 90% full strength in 15 minutes. In most cases the site is ready for traffic right after clean up.
Select stabilization grouts have compressive strengths up to 2,000 psi
Stabilization Lasting Decades
Alchatek structural foams are stronger than crystalline bedrock.