
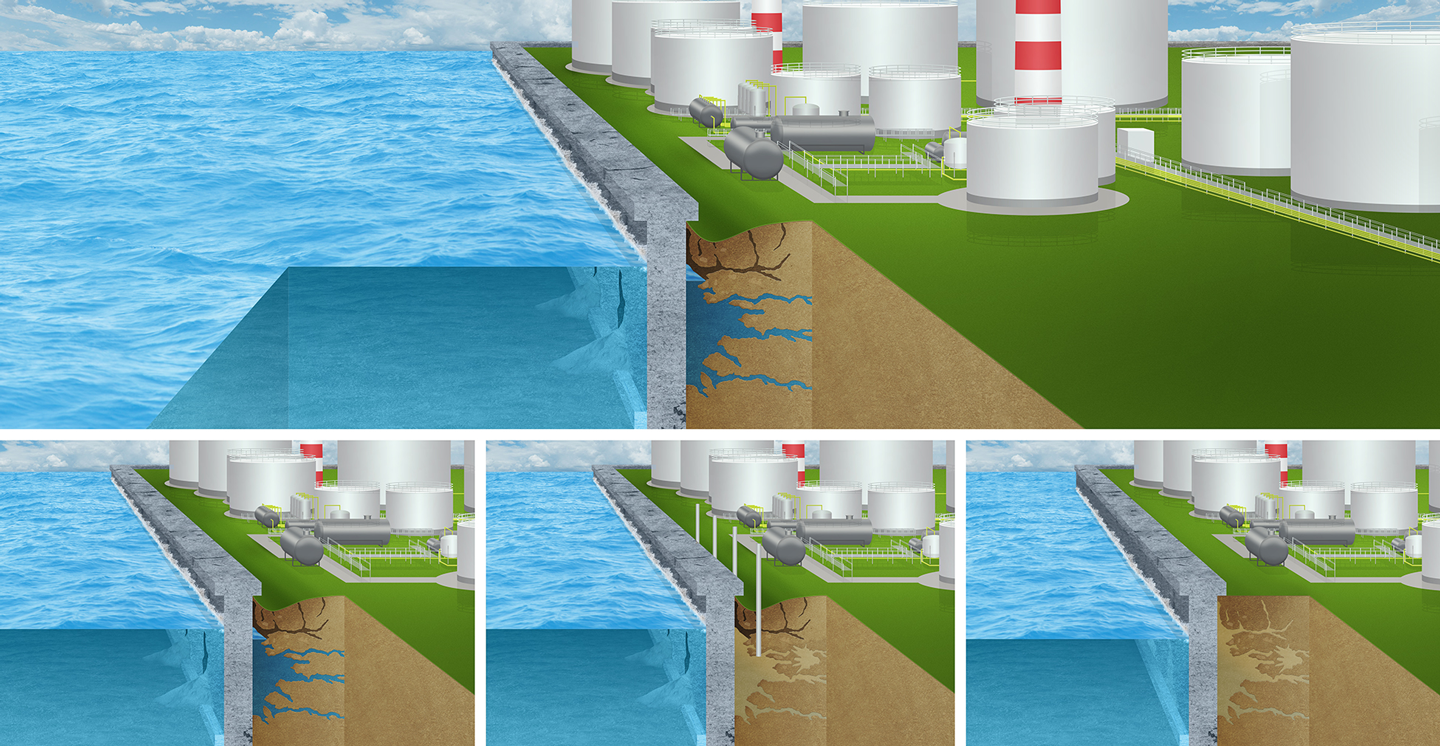
Seawall Stabilization Process:
Step 1: Assess and Prepare
Identify the problem, protect the area, and drill access holes.
Step 2: Inject and Stabilize
Inject polyurethane to seal leaks, fill voids, and stabilize soil.
Step 3: Clean Up and Review
Clean the site and review the completed repair.
Fact: Water Movement and Soil Loss Are Often the Real Problems Behind Seawall Failure
Repair with Advanced Proprietary Technology
Seawall Stabilization
- SW-RP1 Stabilization & Leak Repair Material
- Pressure Release Technology
- Structural Repair for Seawall Caps and Panels
- Advanced Permanent Anchoring System
Seawall Preservation
- SW-Prevent: Corrosion Inhibitor
- SW-Power: Strength Builder
- SW-Protect: Surface Protector
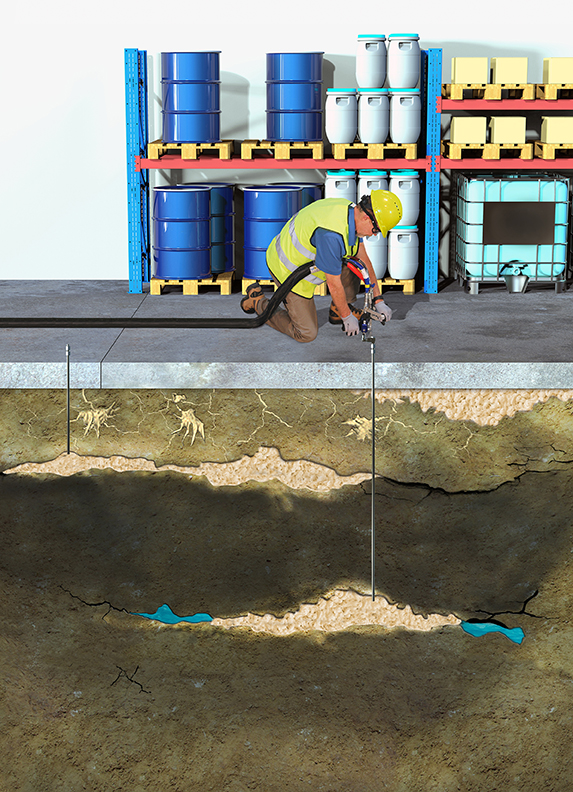
What Causes Seawall Instability?
Erosion
Water movement can wash away supporting soil from behind the seawall.
Poor Drainage
Improper drainage, leaking pipes, broken water lines, and trapped water can increase pressure behind the structure.
Voids Behind the Wall
As soil washes out, empty spaces can form behind or beneath the wall, reducing support.
Hydrostatic Pressure
Water trapped behind the wall can create pressure that leads to cracking, movement, or structural stress.
How Does Polymer Repair Help?
Seals Active Leaks
Alchatek polyurethane materials react with water and expand to help seal cracks, joints, and leak paths.
Stabilizes Soil
The material can move through loose soil and voids, helping create a more stable support zone behind the wall.
Fills Voids
Polyurethane grout expands into open spaces created by erosion or soil loss.
Reduces Further Soil Loss
By sealing water pathways and stabilizing loose areas, the repair helps limit continued erosion behind the wall.
What Are the Results?
Reduced Disruption: Repair with less excavation and downtime.
Improved Support: Fill voids and stabilize soil behind the wall.
Leak Control: Seal cracks, joints, and water pathways.
Long-Term Preservation: Help extend the life of the structure.